Congratulations, you have successfully installed Fuzzy Studio on your computer. This means that you have probably completed the most complex task in this entire guide!

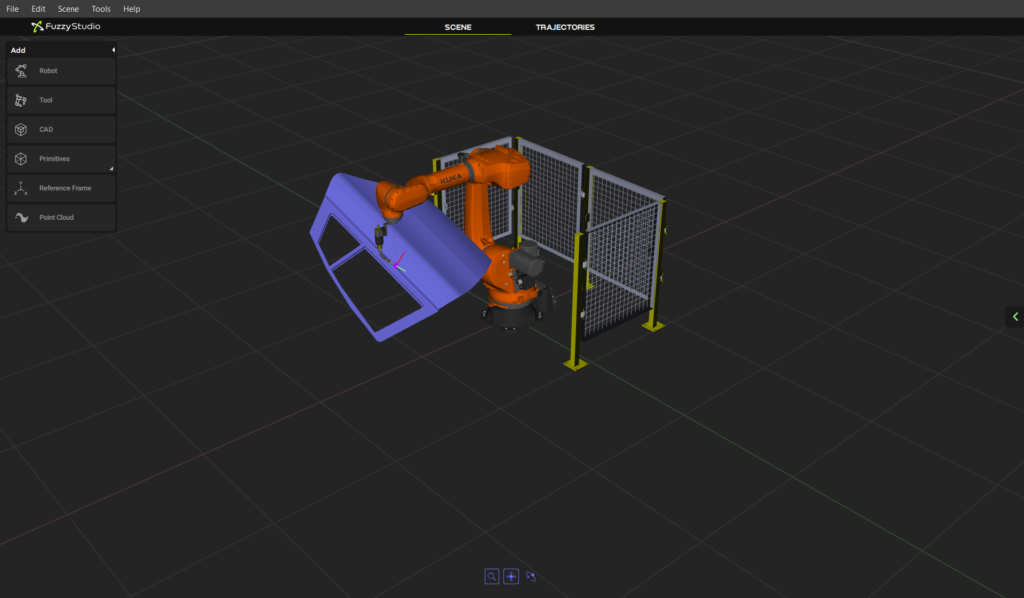
Let’s take a look at the interface you will see the first time you use Fuzzy Studio.
After reading this article, you’ll be more familiar with the interfaces you’ll use most often in Fuzzy Studio. These different panels are essential for using the software well. You will be able to easily navigate between the different interfaces and know the main actions of each one.
Scene Panel
Let’s start with the scene panel. The scene panel is the place where you can easily design your robot’s environment. You can select your robot from the Robot Library, add tools to it, bring CADs into your environment… And easily change the position of any element. Most 6-axis industrial robots with real-time capabilities are included.

Trajectories panel
The Trajectory panel can be accessed when a robot is present on the scene. It is the place where all trajectories are created and previewed. Created trajectories can then be accessed for export or real-time playback with the RTOS.
It is composed of a Trajectory Library (1), multiple Waypoint Generators (2), a Waypoint list (3), a Control bar (4) and a Trajectory generation panel (5)

When a trajectory is selected, an additional panel called Trajectory Properties Panel is accessible on the right side of the interface. Here you can change the position and orientation of the trajectory origin using the Transform parameter.
Focus on the waypoint generators
To add waypoints to a trajectory, you must use one of the available waypoint generators. These tools allow you to create all your trajectories.

- The File Generator allows to import csv and json coordinate files to create waypoints in Fuzzy Studio. This allows you to use external tools to create trajectories before importing them into Fuzzy Studio.
- The Record Generator records waypoints along the trajectory at regular intervals.
- The Edge generator creates regularly spaced waypoints around one or more successive contours of a surface, with all waypoints normal to the generating surface.
- The Surface generator creates a regularly spaced trajectory that parses the entire surface. It is very useful for grinding, polishing, or surface treatment purposes.
- The Tool Pose generator adds a waypoint at the current position of the virtual robot’s tool pose materialized by its TCP. It stores the position and orientation of the current TCP and adds it to the trajectory.
- The Cursor Pose Generator allows you to place waypoints on the cursor pose by clicking directly on CAD objects. Each waypoint is placed directly on the clicked surface with the Z-axis oriented according to the normal of the model. It is compatible with STEP models or surface models such as STL or meshed PLY.
Robot connection panel (or Robot control)
The Robot Control panel is used to set the connection between Fuzzy Studio and RTOS.

With Fuzzy RTOS and a Fuzzy Studio production license, you can connect Fuzzy Studio to any supported robot controller to control robots in real time with Fuzzy Studio. To do this, you first need to set up your system, and then you can use the Fuzzy RTOS Lancher app and the Robot Connection panel to start your system.

Scene manipulation
The Fuzzy Studio scene is a 3D environment that can be manipulated by using the mouse.
3 modes are available :
- The Zoom mode allows to zoom in and out on the scene when you hold the left click
- The Panning mode allows to pan the view on the scenewhen you hold the left click
- The Orbital mode allows to rotate the view around the center of the view when you hold the left click. It is the default mode
When you use an external mouse and your are in the Orbital mode, you can use :
- The left click will rotate the view
- The Right click will zoom in and out
- The Middle click will pan the view
- Holding the left and Right click at the same time will pan the view
Next Tutorial
Getting Started with Fuzzy Studio #3: Build Your First Simulation
