End of Arm Tooling, or EOAT, is an essential part of any industrial robotics project. It could even be argued that a robot is nothing more than a device for moving around tools!
There are a lot of ready-to-use EOATs on the market, but there are just as many, if not more, times where custom tooling is needed.
In this tutorial, we will look at how to export a custom tool designed in Autodesk Fusion 360 for use in Fuzzy Studio.
For this example we will be using the spot welding gun from the following CAD model available on GrabCAD: https://grabcad.com/library/robot-spot-weld-1
All credit for this file goes to user “SCARAB” (https://grabcad.com/scarab-1).
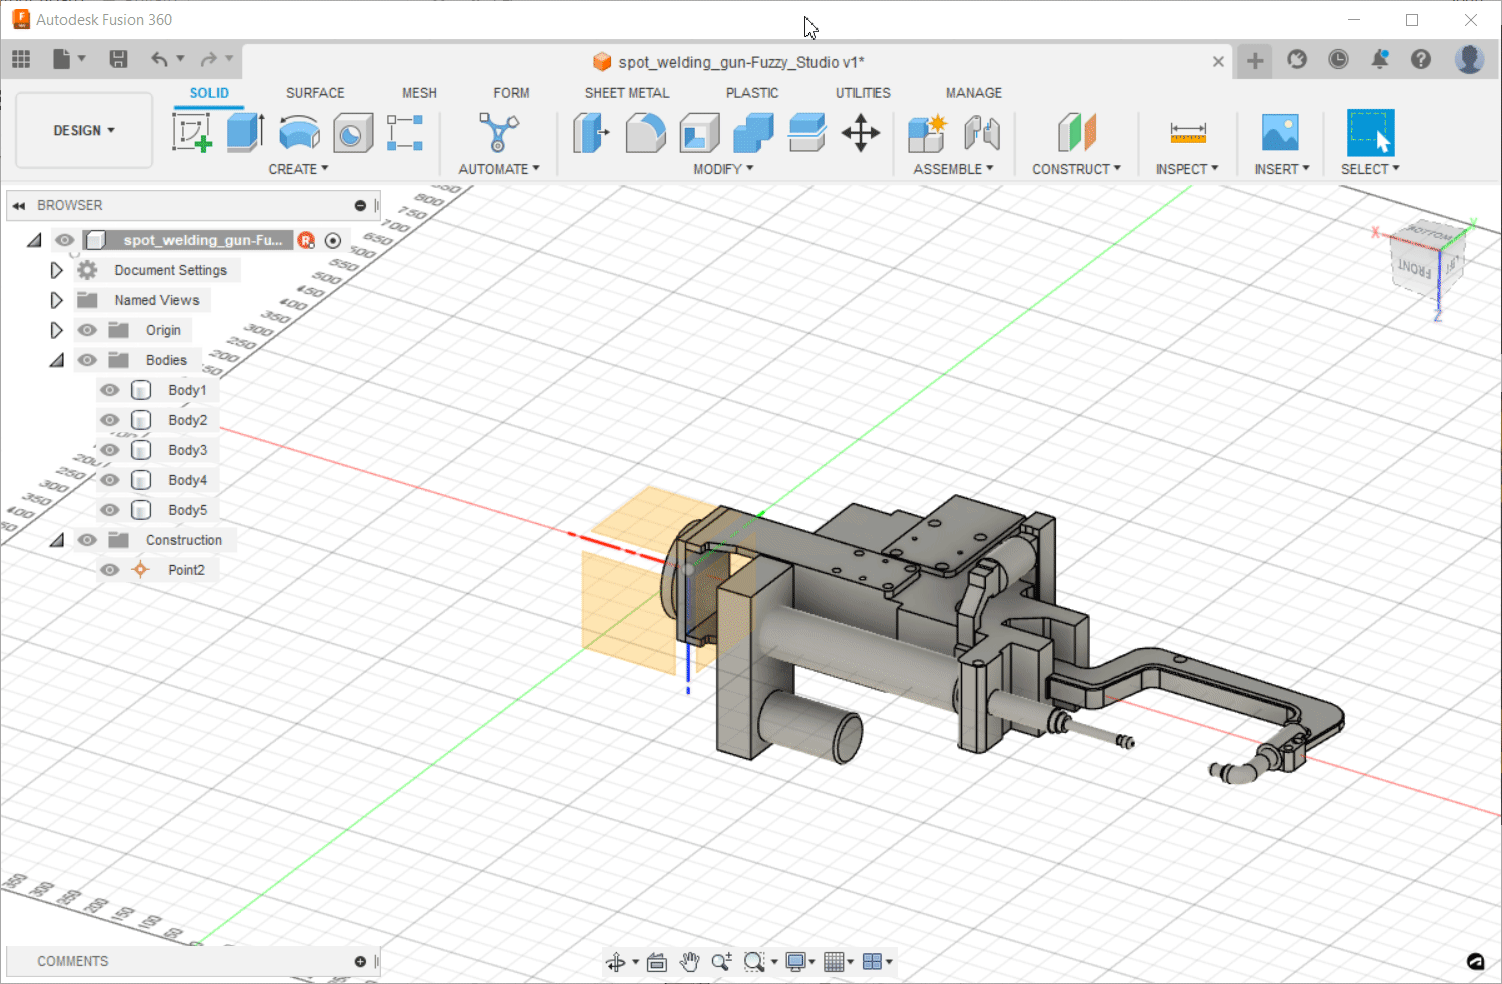
The snapshot on the right shows the whole workcell that is provided.

All we are interested in today is the spot welding gun.

If you have a GrabCAD account go ahead and download the model and open it up with Fusion 360. If you don’t have an account feel free to download the spot welding gun here:
Download the spot welding gun STEP file here.
When we open the extracted spot gun in Fusion it looks like this:

To get our tool into Fuzzy Studio we are going to follow these steps:
1. Set the attach point to the origin
2. Measure the TCP
3. Export to STEP
4. Import and Configure our spot welding gun tool in Fuzzy Studio
1. Set the attach point to the origin
Right now our tool is offset from the origin.

In Fusion, the scene origin is used as the origin of the exported step file. When a tool is imported into Fuzzy Studio the step file origin is used as the default attach point. So lets move our assembly so that the desired attach point is at the origin of the CAD scene.
First, we add a construction point to the mounting flange. This point will make it easier for us to move the whole assembly to the CAD origin.

Once our point is added we can now move all of the assembly to the origin using the point to position tool and our previously created construction point.

Now we want to make sure the orientation of our attach point is the same as the robot’s flange orientation. This can be done by rotating the Fusion scene so that the origin axes match those of the robot flange axes in Fuzzy Studio as shown below. For reference X=Red, Y=Green, Z=Blue (XYZ =RGB).


For this spot gun we want the length of the tool to run along the Z-axis and for the jaws to open away from the robot so in the X-direction. This means we need to rotate once around the Y-axis then a second time around the Z-axis.
We use the Move tool once again and our construction point to do this in just a few steps.

That’s it! Now we can set the TCP.
2. Measure the Tool Center Point (TCP)
The Tool Center Point or TCP is the reference frame we use to move along trajectories. For example an MIG welding torch this is usually the tip of the wire coming out of the torch. This is where the point that Fuzzy Studio will move along any trajectories you create. Custom tools often have multiple TCPs for different reasons and with Fuzzy Studio you can configure as many as you like for a single tool. For our spot gun, we want the TCP to be near our stationary weld tip. We will position the tip first and then close the jaw to perform the weld. For this example we want the TCP to be exactly 4.5 millimeters from the stationary tip.
To do this we will create a new construction point on the stationary tip.

And then move it 4.5 millimeters in the -Z-direction

Now using the Measure tool we can measure the transform between the origin (attach point) and our newly created TCP.

We can now record the X, Y and Z offsets to be used in Fuzzy Studio.

3. Export to STEP
We are now ready to export the newly adjusted tool to STEP format with all of our modifications.

Finally, don’t forget to take a screen shot of the tool to use as it’s thumbnail. Or just use the one below if you are using the same STEP model.

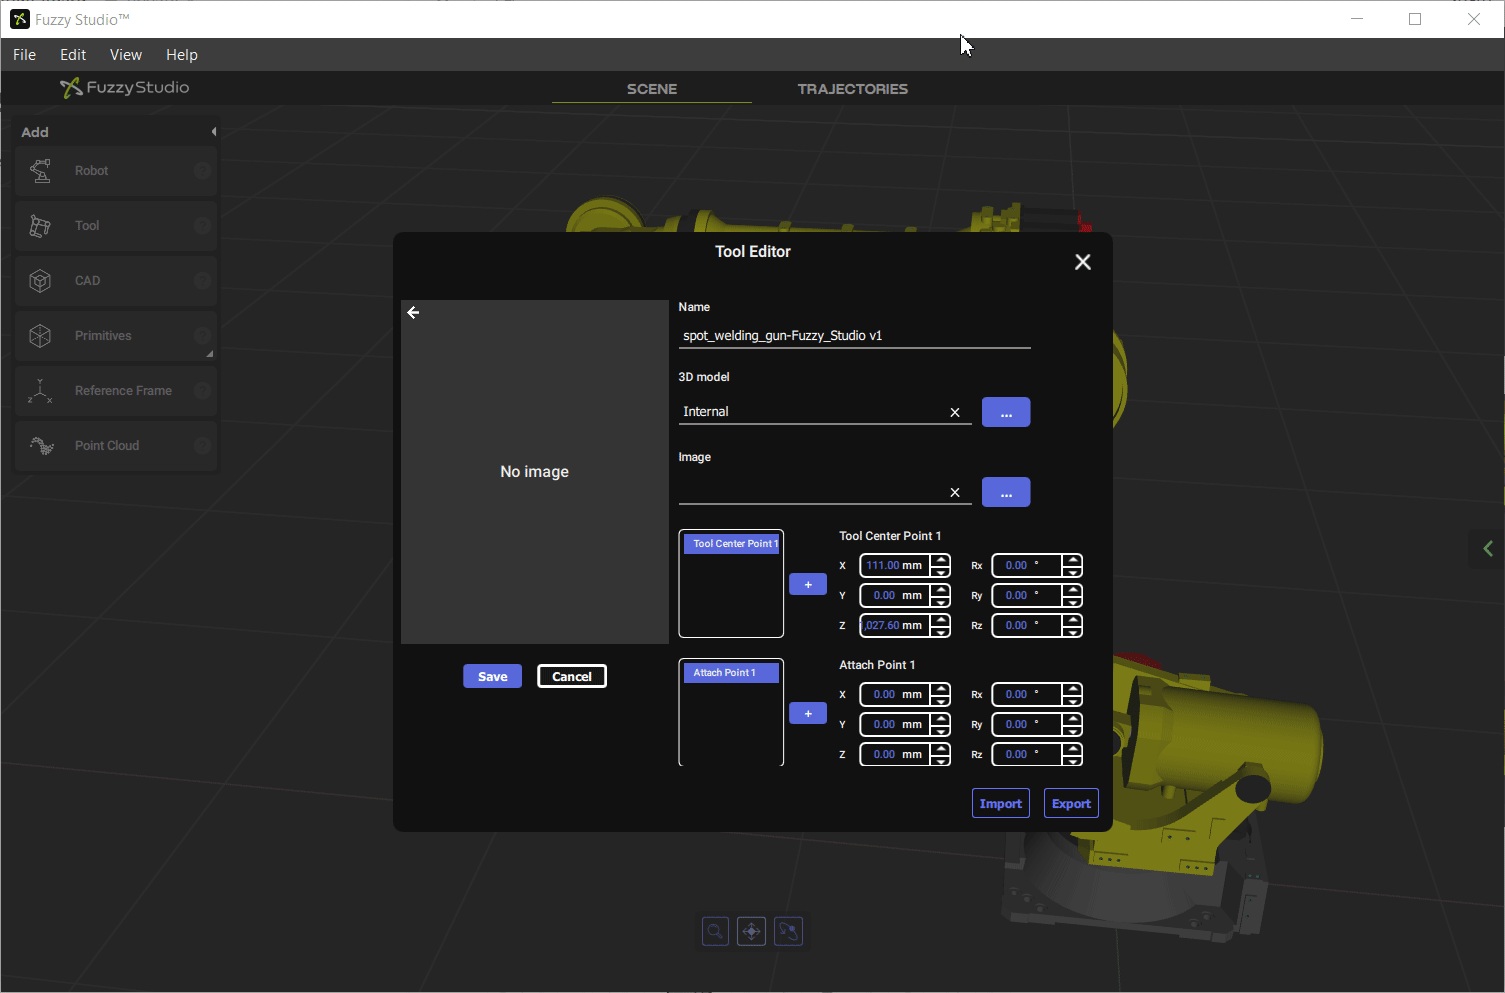
4. Import and Configure our spot welding gun tool in Fuzzy Studio
Adding a new tool in Fuzzy Studio is super simple. In the scene panel, click the Tool button and Add new.

In the tool editor window we can select our exported STEP file and a name will automatically be set for our new tool based on the underlying CAD model.
Now we will edit our TCP with the values we measured in Fusion.

Our tool is now ready to use, so we save and open the tool to see our handy work.
That looks pretty good! Our tool attached and oriented exactly as we imagined and we can go ahead and test out the TCP to see if the robot seems to be moving properly.

We didn’t have to modify the attach point parameters because we properly oriented the STEP file in Fusion. But, let’s say you want to rotate the tool 180 degrees – you can use the attach point transform tool to change the transform between the Robot’s flange frame and the tool attach point. You simply edit the Rz value and the tool will be rotated around the Z-axis by that amount. Please note that you will have to correct your TCP if you rotate the tool.

Finally, let’s go back into the tool editor and add our thumbnail so we can find our tool easily in the tool library.

Our spot welding gun is now ready for action!

